Project – Pantry Closet

First off – this is what we in the Lazy Daze community call an “Andy Baird Pantry”.  Praise and kudos go to Andy Baird for building one in his Lazy Daze motorhome ‘Gertie’, then doing another in his current ‘Skylark’.  He wrote it up completely with great info and pictures, and drew up design plans that make it very easy to follow and duplicate. (Also, there is a LOT of other great info on his “Eureka!” website.)

Before

The ‘before’ picture.  This space is calling out for a floor to ceiling pantry closet.

Anyway, I’d always wanted an Andy Baird pantry.  Both on my prior rig, which was the same floorplan as Gertie, and my new RV, which is the same plan as Skylark.  While parked at my folks place (with the awesome wood shop) I asked my dad if I would be able to build one. Turns out I never would have been able to do it myself, but together we did get it done.  We studied Andy’s plans and one day headed in to Home Depot and Lowe’s in Marble Falls to get the supplies.  Dad thought we would need three pieces of oak 8-foot 1×4 boards to make the two 6′ tall sides, plus top/bottom/center pieces and the moveable shelves.  Instead of using the full 1″ thick shelf pieces he would run them through a saw and make 2 shelf pieces out of each shelf board.  I wasn’t sure they would look good or work well being sawed in half and 3/8″ thick.  However, I was wrong.  After running through the sander they looked perfectly fine.  And oak is very strong, even at half thickness.

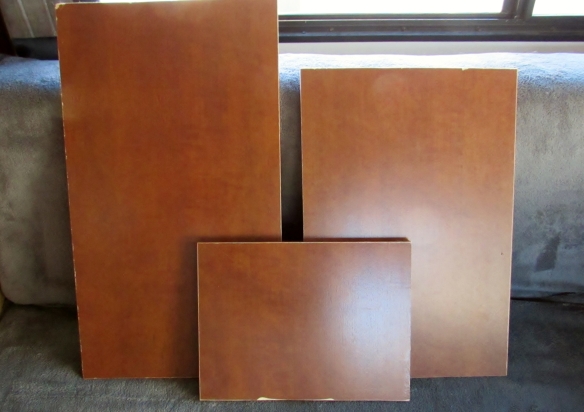
The other big piece was the door, which was to be an 18″x72″ piece of 3/8″ oak veneer plywood.  Turns out that piece is hard to find.  Home Depot and Lowe’s had 1/2″ oak veneer plywood, or 3/8″ of poplar or other lesser woods.  We figured we would have to find it at a specialty wood shop in south Austin, although I couldn’t find any online.  But, at one point we were driving through Burnet, passing by a cabinet maker he knew who was retiring and closing down his business.  We popped in and he had a piece that I could buy back at the shop at his house.  Score!  We felt really lucky that dad noticed the guy cleaning out his building as we passed by and that he had the piece available. We were able to get the other parts: hinges, L-brackets, magnetic catches, pull handles, etc. at Home Depot and at a True Value hardware store.

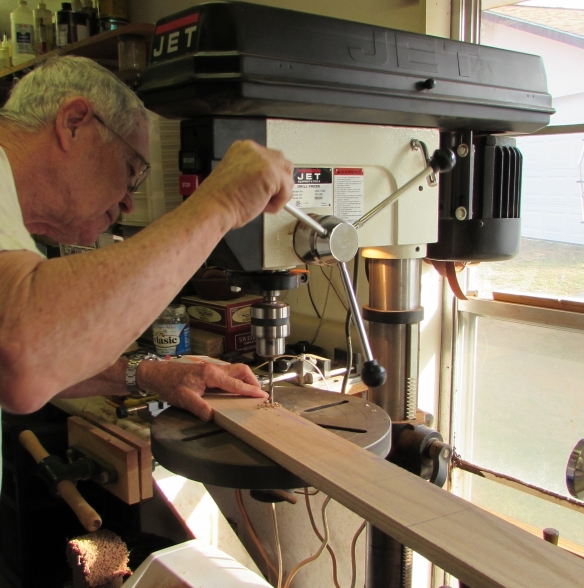
First thing to do was to make holes in the sides.  I didn’t really think I needed holes spaced an inch or two the whole way down.  We did holes at 4″ intervals, then the next day I asked to add a couple of spots with 2″ intervals.  That should allow enough flexibility for shelf placement.  Having a wood shop with a drill press is handy!

Preparing the sides

Preparing the sides

Sides with holes and the top/bottom/center pieces and 8 more shelves.

Sides with holes, and the 3 top/bottom/center pieces with 8 more shelves. (Before adding the additional holes.)

The cabinet was built at neighbor Don’s “Garage Majal”.  My dad and his buds Alan and Don love working on whatever project anyone comes up with.

Building the cabinet

Building the cabinet with Alan

Adding the door hinges

Adding the door hinges with Don

Once the cabinet was built I got busy sanding and staining.  My dad had a power sander, so that made short work of prepping the pantry.  I already had some stain that was a close match to my rig’s interior from making the solar monitor mounting plate.  It really worked well on the red oak.  After sanding I let it dry then sanded it with steel wool.  Then applied a lacquer finish, and went over it with steel wool again.

Sanding and staining

Sanding and staining

Andy wrote about stain-able oak veneer iron-on edging for the edge of the door.  The side of plywood is not pretty.  I picked up some “Band-It” at Lowe’s and it took the stain really well.  It ironed on well, too.  It’s wider than the 3/8″ plywood, so we trimmed the excess with a box cutter knife.

Iron-on Trim

Staining the iron-on trim

Then, we got the door put back on and attached it to the wall with the L-brackets.  We really wanted to attach to something besides just the wood paneling on the back of the shower wall. There aren’t vertical studs in the wall there, but we did find a couple of horizontal pieces with the stud finder, so screwed into those.

Here it is, finished and mounted.  I was even able to find the decorative medallion handle piece that Andy used.  I really liked the idea of having a pull knob that doesn’t stick out.

New Pantry

New Pantry

And, we were able to keep the accordian door that lives on the side there.  Andy had removed his to move the pantry further back, as he didn’t use that door much.  I use that door A LOT, probably a few times a week.  I didn’t want to lose it to gain the pantry.  I want it all, of course!

The little hook and eye piece was the hardest to find.  Generally those type pieces found at hardware stores are crude, barn door type fixtures.  Finally, I found this little guy below, at Home Depot in Austin.

View of side of door showing iron-on trim and door hardware

View of side of door showing iron-on trim and door hardware

The door is held closed with the 3 magnetic catches.  The hook/hasp is extra security when traveling.

Interior View

Interior View

One problem we had was the spot was right in front of the duplex outlet for the back of the coach.  We had to cut out a hole in the back for the outlet, then cut a hole in the side so I can run a cord through the side.  I have a power strip plugged in there now, so I can just plug into that as needed.  One major item we did differently than Andy’s plans was to put a backing board (1/4″ thick) on the pantry.  It made it easier to get the thing square, and didn’t add much weight-wise.  But, then we had to deal with the plug.  Easy fix, though

Cutouts for electrical outlet

Cutouts for electrical outlet

All loaded up:

Pantry in use

Pantry in use

I found a package of 10 hangers at the dollar store one day.  These are good heavy wire.  I cut the tops off with snips, then bent for shelf guards, like Andy shows on his site.

Making wire shelf guards

Making wire shelf guards

I’ve only added 2 so far.  I bungled up those shelves making the holes with my Dremel tool.  I packed my good Dewalt cordless drill this trip, so will get that out one of these days and make proper holes in the other shelves for the wire hanger guards to sit in.  Surprisingly the stuff doesn’t move around much in travel.  I have not opened the pantry and had anything fall out yet.  Yet.  So, I really should get the rest of the wire guards up.  🙂

Altogether, the materials cost $182.  Plus, the invaluable time and efforts of my dad (and Don and Alan).  I think it’s a great addition to my home!

Project – Solar Upgrade

FYI – This post may only be of interest to a few people – those wanting info on solar, or Lazy Daze owners interested in our specific rig upgrades.  Feel free to skip or skim.  🙂

My 2001 Lazy Daze came out of the factory with the optional solar package that was available at the time.  It had one 85-watt BP Solar panel and a Heliotrope RV-30S charge controller/monitor.  The system helped to charge the batteries a bit, but wasn’t great for the serious boondocking that Riley and I like.  I needed a solar system like my dad and I put in the prior rig.  When I got back to Texas in November we talked through the project, deciding what to do the same as last time and what to change.  Having a bit of experience helped.  Having a different floorplan didn’t.  We realized the prior 22′ twin-king floorplan was a super simple setup.  The wires could come from the roof down the fridge vent, straight into the battery box below (and below that to the extra battery set in the old generator compartment) and then to a cabinet directly inside where the controller, monitor and inverter could be housed.  In this 2001 RV we would have to pull at least part of the existing wire and route new.

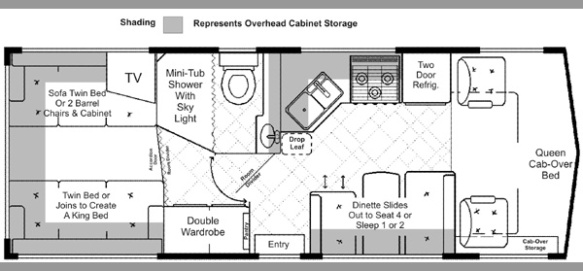
For a visual help, this is my 2001 Mid-Bath floorplan

For a visual help, this is my 2001 Mid-Bath floorplan

First things first, I ordered the panels, controller and monitor in December.  Last time I got the panels with wiring harnesses from AM Solar, a great company for solar.  But, I noticed they use Grape Solar panels, which I had seen for sale on Amazon.  This time I looked at the Grape Solar website and scouted out their dealers for a good price on panels.  Eventually I settled on two 160 watt panels from Home Depot (Amazon was out of stock on the 160’s). Turns out that Home Depot sells them, but they are actually shipped directly from Grape Solar.

Brand spankin' new panel

Brand spankin’ new panel

My dad removed the old panel with a small power saw.  He just cut off the mount, rather than removing the goop and taking the mounts off completely.  The new panels would cover these spots anyway.

Removing the old panel

Removing the old panel

The AM Solar panels we used last year came with wiring harnesses and mounting hardware, but I was able to buy that stuff separately from Amazon this time.  I did get the charge controller and monitor from AM Solar, as they had the best prices on the ones I wanted.  Also, they have a good combiner box for the wires on the roof to go into the fridge vent.

Solar panel wires go to the fridge vent combiner box

Solar panel wires go to the fridge vent combiner box

Solar panels all wired up

Solar panels all mounted and wired up

The original charge controller/monitor was located inside on the side of the cabinet above the kitchen sink, directly across from the entry door.  The wiring to the solar panel went from there, through the cabinet, behind the microwave and through a hole in the cabinet next to the fridge.  They came out on the roof through a vent cap, the same type used for the black and grey tank vents.  We removed those wires and put back/sealed up that cap.  The wires from the controller to the power center and batteries went the same route, but to an area behind the fridge to go down towards the floor.  The battery box is directly below the fridge and the RV power center is under the kitchen sink.  After thinking of how to use the existing wire or run new, we decided we didn’t want to pull out the fridge to run wire back there.  Instead we put the new controller under the kitchen drawers, in between the power center and the battery bank.  It would be easier to abandon the original wiring and run everything down along the floor.  We were able to drop the wires down the fridge vent, to the access panel on the outside of the rig, and inside through the back of the battery compartment.  Under the fridge inside is a drawer and cabinet.  By pulling out the drawer we were able to get in there to work on the wiring.  Also, I decided to add an on/off switch, so I could easily disconnect the power from the panels if needed.

Inside wiring

Wires come in from the battery box (the black part) and to the left towards the charge controller.  The orange wires are for an inverter on the right side.  The white stuff is Dicor to seal holes.

On/off switch

The positive wire runs through the on/off switch.

New Controller

New charge controller, just above the LP gas detector.  Blue Sky 2512iX-HV

The fresh water tank is behind this wall above, under the oven and kitchen drawers.  There is about 4-5 inches of space between the wall and the tank, so we were able to attach the controller and run the wires along the floor inside there.  I rarely have to look at the charge controller, so it can reside near the floor.  I’d rather have the monitor at eye level.

For the battery monitor I purchased a Blue Sky IPN-ProRemote.  It’s the same kind Chris had and seemed like a good one.  Also, it’s made to work well with the Blue Sky 2512 charge controller.  We decided to mount in in the space where the old charge controller/monitor was.  There was a large hole in the padded side of the cabinet where the original controller/monitor was, so we had to create a mounting plate since the new monitor was smaller.  We made the piece below from some 1/4″ scrap my dad had and stained close to the color of the other wood.

Monitor

New monitor and mounting plate.

We put the fuse for the controller on the side of the power center, just inside the access panel door.

Controller fuse

Controller fuse

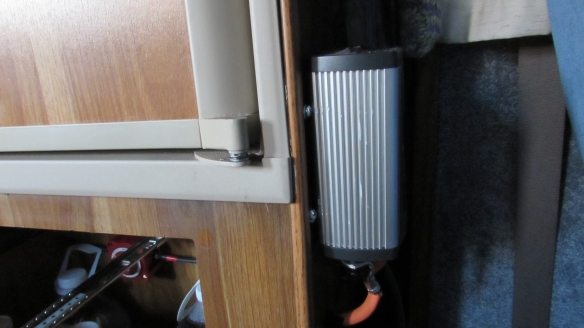
On my prior rig I had a 2000-watt Xantrex inverter.  It worked great. I could even run my microwave and toaster from it (for just a minute or two).   But, that seemed like overkill since I have a generator on this rig.  I already had a 400-watt inverter on hand that I had bought to charge my laptop, so we decided to use that.  If I decide it’s not enough power, I can get a larger one later.  We mounted it on the side of the wall next to the refrigerator, behind the driver’s seat and across from the dinette.  It’s about 2 feet from the batteries there, which is good.  And I can use it for charging stuff up front.  (I have a 150-watt inverter in the back, mounted in the old TV cabinet, plugged into an existing 12-volt plug.)  Because I’m not sure the 400 watt inverter is going to be enough, we used big wire – 2/0 welding cable – so that I can easily upgrade later without having to rewire.  That’s the orange wire seen in the wiring picture above.

Inverter mounted next to the fridge.

Inverter mounted next to the fridge.

The parts we used are gathered in the Amazon store I put together of the items I use in my RV – Amazon.  All together the system and parts cost just under $1,200.   Plus, the inverter was about $25 when I got it last year.  And, I can’t thank my dad enough for doing this project.  He finds it fun (25+ years as an IBM Electrical Engineer, this is his kind of thing), but I really appreciated all his time and efforts.

Next up, the last of the major projects my dad and I completed – a new pantry closet.

Project – TV Cabinet

The TV on the Lazy Daze mid-bath floorplan is above the couch on the driver’s side, on the backside of the shower wall.  Of course, since I am the queen of not taking a before shot, I had to find a picture (of a different floorplan) from the Lazy Daze site showing a similar overhead TV cabinet in a new motorhome.

Old TV Example

Photo of a new Lazy Daze (rear kitchen plan) showing the overhead TV cabinet with flat-panel TV attached.

I really hated the high TV.  It was literally a pain in the neck to watch at that angle.  I wanted to try to put a flip-up table in the back corner, like in my prior rig.  Running the cable and power to it would be a challenge, though.  Or maybe attach it to the wall behind the shower.  We found that there was a stud along the corner of the wall, next to the folding accordion door, that we could use to attach a TV mount to.  I had found a very light LED TV at Walmart that weighs only about 10 pounds.  It could certainly attach to that stud on a swing arm TV mount.

New TV

New TV

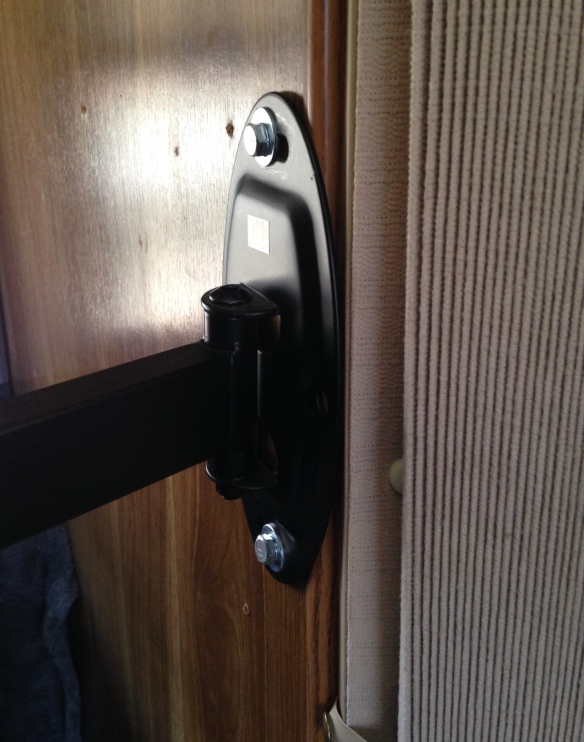
I had to remove a magazine holder/rack thingy from the wall, but that was easy enough to do.  I ordered the swing-arm mount from Walmart.  They didn’t have the right kind in the stores, so had to order it online.

TV Mount

TV Mount

After removing the mounting hardware for the prior TV we were left with an odd shaped cabinet.  I thought that if we mounted the TV on the wall then the cabinet could be used for storage. I envisioned a small shelf coming off of the slanted portion for a DVD player, and a shelf above it against the back wall to put books or DVDs or whatever there.

Empty TV Cabinet

Empty TV Cabinet

We discussed having a cabinet door built and stain it to match as close as possible.  Then I thought it would be good to get a piece of black plexiglass, like on a real entertainment cabinet.  Neighbor Alan had a piece from some project he had worked on so he brought it over and it seemed like a similar type piece, cut to fit, would work well.  I was able to find a plastics shop in Austin that could cut me a piece of grey smoke plexiglass for $15, so arranged for that on my next trip to town.

In the meantime we got to work making shelves for the cabinet.  I thought we could use a standard Home Depot shelf piece that I was using under the dinette.  It’s actually too long for the space there and extends under the dinette cushions.  If we cut it to fit just between the dinette seats I would have plenty left over.  So, we did and cut the remainder into 2 boards, one for the DVD player and one for a book and video shelf above. (Did I mention my dad is a woodworker and has an awesome wood shop?  Handy!)

One shelf becomes three - 1 long one for the dinette, small and medium ones for the TV cabinet.

One shelf becomes three – the longest one for the dinette, small and medium ones for the TV cabinet.

So I stained the bare wood on the bottom of the cabinet and Dad cut some triangular pieces to attach the DVD shelf.  That was one of the hardest parts of the project.  Getting the angle right on those triangles was tough, since the slant of the cabinet is really wacky.  Eventually we got the shelf really close to level.  The longer shelf piece hangs off a short platform at the back of the cabinet.  Again, it took a little bit of getting angles right for the two wooden block shelf supports that sit on that slanting base.

But, when it was done, the shelves looked and worked great.  I mounted my 12-volt power-strip inverter in the cabinet so that I can run the TV and DVD player when off grid.  The 12-volt plug is in the cabinet to the left of this one, with the cable/antenna booster switch outlet.  The cabinet ended up being a good spot for my DeLorme and Benchmark atlas books.  They are extra tall and the right side of the cabinet is extra long.  I was worried about the stuff in there falling during travel, but it’s packed in tight and nothing moves.  And the DVD player sits on a piece of no-skid material on its shelf.

New TV Cabinet

New TV Cabinet

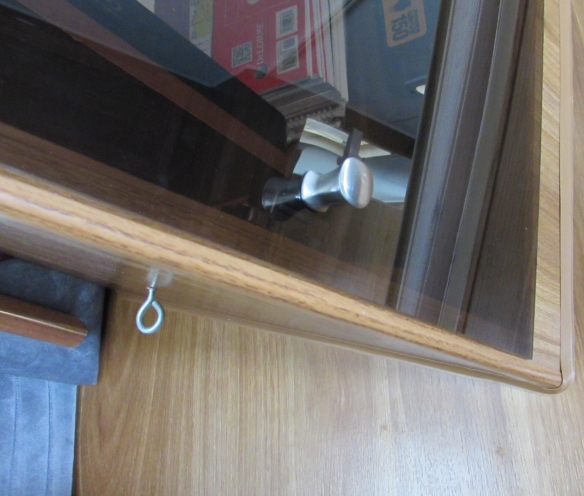
Finally, I got the plexiglass piece in Austin and went to Lowe’s for the mounting hardware.  We needed hinges for hanging, a pull knob piece and a magnetic catch to keep it closed.  This was the other hard part of the project, getting the door hung.  I found a small, simple hinge set.  Most hinge sets are too big for a thin plexiglass piece – they are made for thicker wood cabinetry.  Only the simplest hinge set would even come close to working. Then the screws that came with the hinge set wouldn’t work.  They were made for wood and for a thicker door.  After several attempts we found a certain type of screw that had a flat head for the backside that worked with a decorative nut for the outside.  It’s not art, but it works:

New TV Setup

New TV Setup

I think it turned out pretty darn well.  If I had it to do over again I would buy a smaller TV.  It’s 28″ and a little big for the living room space.  It does fit nicely when back against the wall, resting gently on the top of the couch.

Magnetic Latch

Magnetic Latch and knob pull

Hook

Hook underneath the cabinet used for travel support

I added the eye-hook under the cabinet to attach additional support during travel.  I wrap the TV with a fleece throw and attach a couple of bungee cords.  I like to have it nice and snug while in motion.

Travel Mode

Travel Mode.  My loom folds up and travels on the couch under the TV, with my yarn basket.

Watching and Weaving

Watching and Weaving

And there it is.  A great entertainment setup.  Watching a race and weaving a shawl on my fold-up table.  Life is good.